What is Diamond Painting? Detailed How-to & Exclusive Tips
TABLE OF CONTENTS
Diamond painting is a new craft that has impacted the art and craft world and made waves among DIY artists and crafters. It has become very popular in a very short time and cemented its reputation as one of the best crafts over a short time.
What is Diamond Painting?
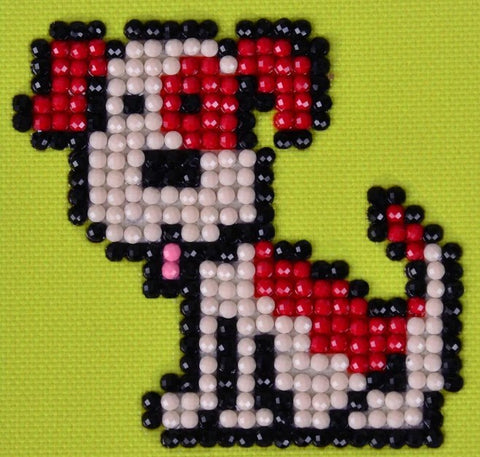
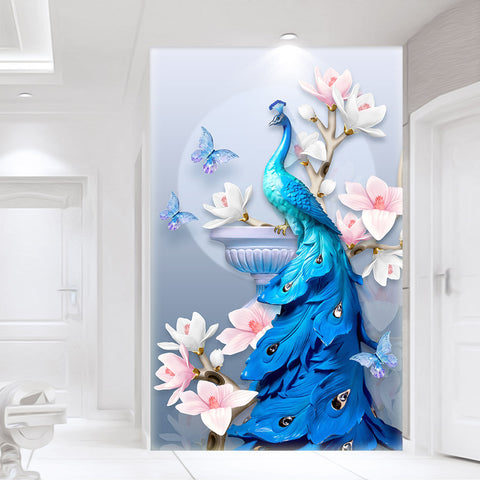
Diamond Painting is the name of a mosaic art form in which the artist creates a painting by sticking small resins that sparkle like diamonds on a canvas that has corresponding numbers printed by all the colors of the diamonds.
All the painter has to do is take a diamond and stick it onto the canvas. All the diamonds together create a beautiful painting that sparkles like real diamonds.
Diamond painting is quite easy to get started with and it requires no prior experience on the painter’s part. arrange your painting supplies in a manner. These factors are very important for the popularity of diamond art and contribute a great deal to what makes diamond painting so unique as a craft form.
Unlike other creative endeavors, you do not have to spend a ton of time learning about diamond art and learning to do it right, but you will learn how to do it almost instantly after you try it for the first time. This makes diamond painting a special kind of art compared to all those hobbies which only make you scratch your head, or worse, make you want to rip your hair off, instead of making you enjoy your time and relax and take a break.
Diamond painting sounds interesting enough to a lot of people but they easily get confused about what it actually is. The reason is the lack of knowledge about diamond painting available to them. As mentioned above, painting with diamonds is a craft hobby in which a ‘painting’ kit is provided to you with all the materials and resources you need to create your complete painting. You have to stick colorful, shiny resins that are made to look like diamonds on a sticky canvas that has letters and symbols printed on it to guide you where to stick the diamonds on the canvas in order to complete the painting.
The process can sound intimidating and feel like a huge undertaking when you first think about it, but that is just part of the fun of painting with diamonds. We will discuss how you can tackle your first diamond painting without feeling overwhelmed and hopeless. The first thing to do in order to accomplish any task, no matter how small or large it is, is to understand what you are supposed to do, the mechanics of it all. You cannot go into building an IKEA bookshelf without knowing how many pieces there are in it. Likewise, you cannot successfully make a diamond art until you understand all the moving parts in it. Let’s discuss those.

Diamond Paintings Kits (Ships From USA)
Frequently asked questions about diamond Art
There are a lot of questions that almost every beginner has when they start painting with diamonds. Some of them have been answered below:
- What causes the diamonds to shine?
The diamonds shine due to the facets cut into their sides. The material of the diamonds is resin.
- What are the steps to making a diamond painting from start to finish?
The complete set of instructions for creating your very own diamond painting is discussed below.
- What size canvas is best for painting with diamonds?
Since diamond painting is a mosaic art, the larger the size of the painting, the more detailed it will look. For beginners, however, it is safer to stick to a smaller painting so they can finish it on their first try. As you get better, you can choose a larger size painting according to your skills.
- What is the difference between 3D and 5D diamonds?
These numbers denote the numbers of the facets cut into the diamonds. The more facets there are in a diamond, the shinier it will be.
- What does a diamond painting kit include?
Most diamond painting kits include similar contents, with small differences. They are mentioned as follows:
1) A printed canvas in your preferred size.
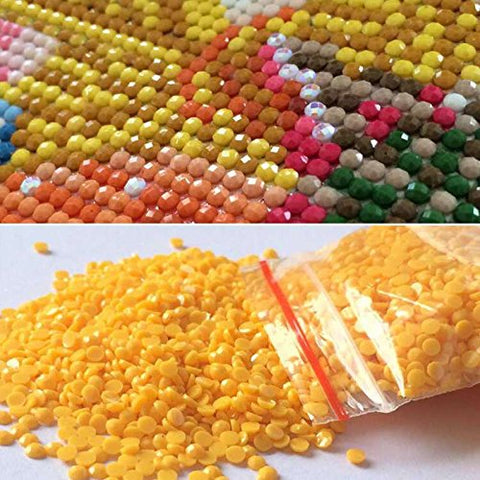
2) Resin diamonds in the required colors. We make sure to include extra diamonds in our kits so you never run out of your favorite color while painting.
3) A plastic tray to hold the diamonds.
4) A diamond painting pen tool to pick up diamonds.
5) Glue or wax to insert in the pen tool.
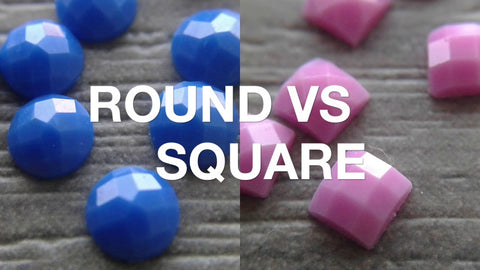
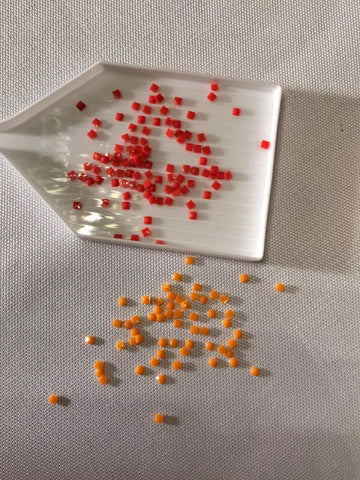
- What are square and round drills used for?
Both types of diamonds have the same use, but perform differently. Round diamonds are easier to pick up and some beginners prefer these for this very reason, but they leave gaps in the canvas which can break the shiny effect of the painting.
- How to use the wax in the kit?
Since a lot of painting with diamonds kits do not come with clear instructions, it can confuse you about how to use the wax provided in the kit. But it is actually quite easy to use. All you have to do is peel off its covering and dip the pen tool in the wax until the nib of the pen is filled with the wax.

- I have finished my diamond painting. Now what?
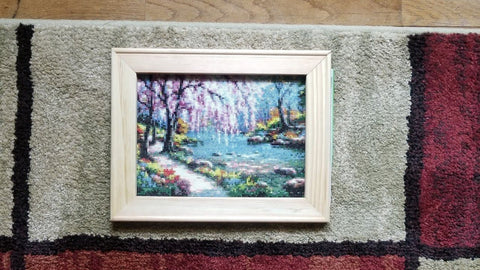
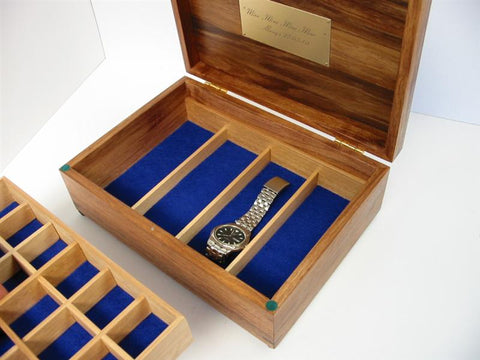
Completing a painting with diamonds is a feat in itself, but if you are an avid diamond painter, it can be a feat to store them all as well. The best way to not only store but also display your diamond artwork is by framing it and hanging it up.
Hopefully these questions cleared the fog up a bit, and now you have a better understanding of how diamond painting works. Now let’s discuss the contents of a diamond painting kit in more detail.
All Diamond Paintings Kits
THE KIT
A diamond painting kit usually has the same components across all brands, though the quality and quantity may differ across brands. We like to provide our customers with the best quality materials that will make their diamond painting experience fun and exciting and make them want to keep it up as a hobby instead of giving up due to sheer frustration.
On average, a diamond painting kit includes the following items:
- The canvas
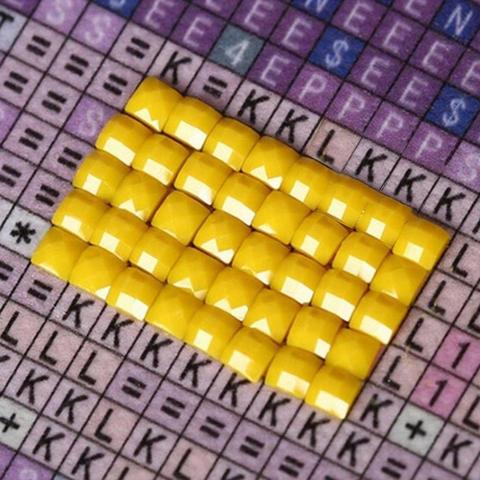
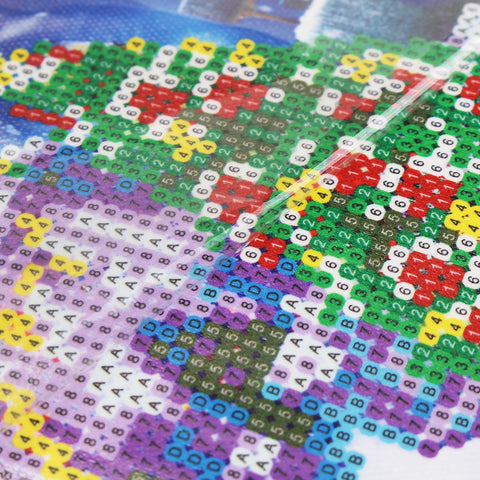
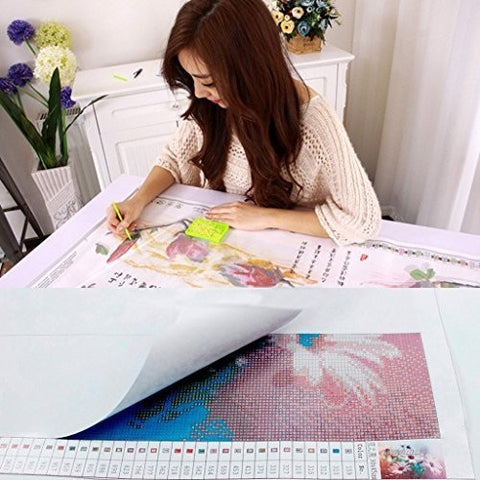
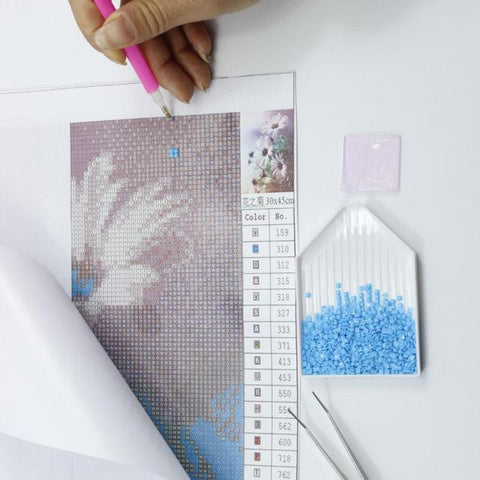
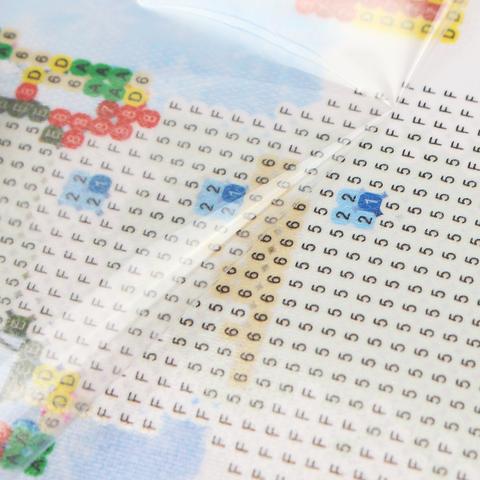
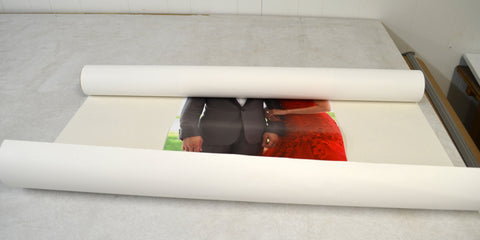
All painting with diamonds kits include a canvas, without which the process of painting with diamonds would be impossible. The canvas is printed with numbers and symbols that correspond with the colors of diamonds and some canvases have a printed guide also. The canvas is covered with a layer of glue that allows the diamond to stick on it with ease, and keeps the painting together.
- The Diamonds
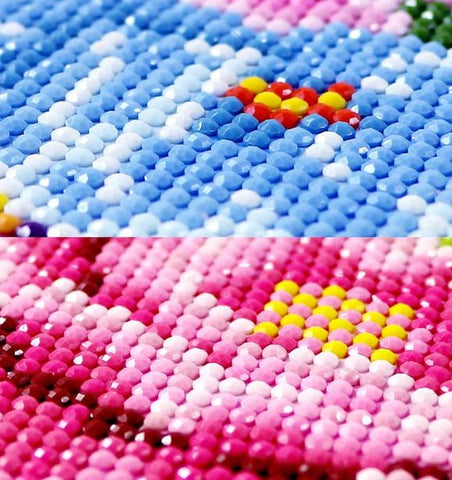
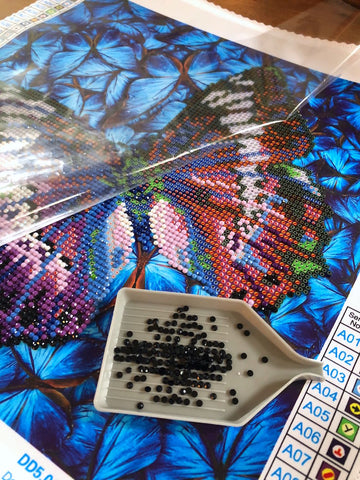
All diamond paintings are incomplete without the diamonds themselves. All kits include various colors of diamonds required to complete the painting. Each color of diamond has a code which is printed on the canvas and also on the packaging on the diamond, and it is important to remember this code to make sure your painting does not get ruined. The more colors there are, the more detailed the painting will be.
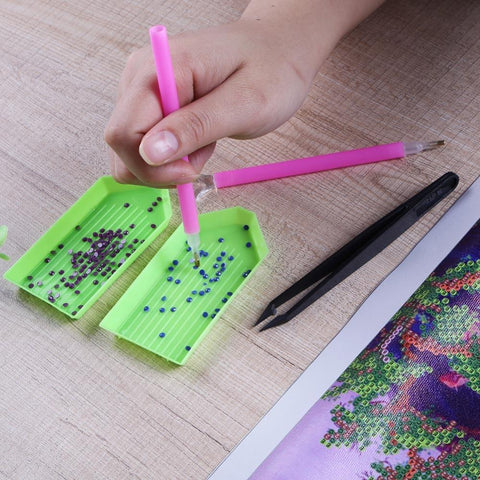
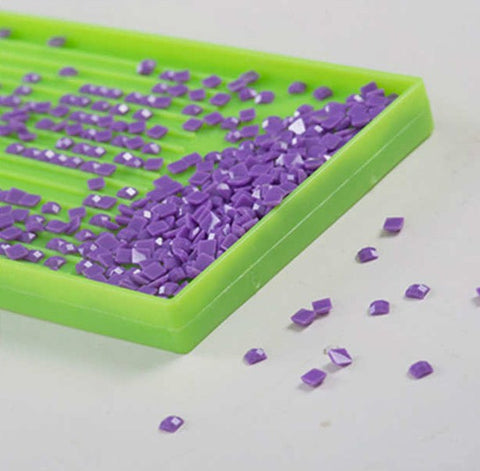
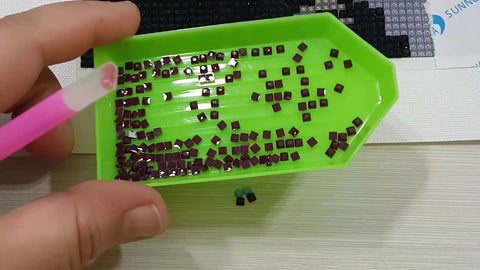
- The Tray
All painting with diamonds kits come with a plastic tray that has thin indentations to help separate the diamonds and make it easy for you to pick them up. The trays also have a dipped corner to help transfer the diamonds back into their packaging.
- Diamond Applicator Tool
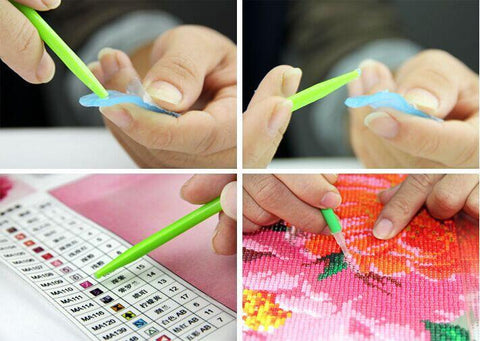
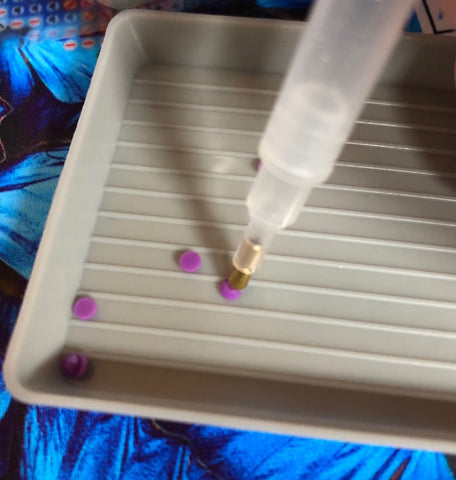
All diamond painting kits come with a diamond applicator. These tools are cylindrical, and resemble the shape of a pen, which is why they’re sometimes called diamond application pens also. These pens come with a hollow end where the nib should be, where the diamond can stick and be transferred to the canvas from the tray. Glue or wax is applied to the nib to help the diamonds stick to the pen.
While kits usually only include a single-drill applicator, a lot of websites and craft stores, including ours, sell diamond applicators that can apply upto 10 drills at a time. This can be quite helpful if you are working on a large painting, or a large area of the painting which requires the same color.
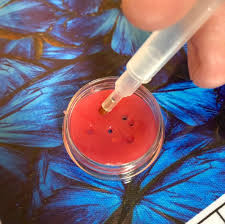
- Wax or Glue
Most kits come with a small tub of wax or glue for the diamond applicator tool, and are used to help the diamonds stick to the pens.
These are the contents included in almost all diamond painting kits, no matter which brand you buy. But the quality of the materials of these contents differs greatly across companies. A lot of cheaper diamond painting kits have subpar quality of diamonds that don’t shine, or a canvas that just won’t lay straight, or is missing a layer of glue.
BUYING A KIT
To avoid these problems, it is best to buy your painting with diamonds kits from authentic, trusted sellers who offer a guarantee on their products.
The contents of the kits can sometimes also include extra materials such as extra diamonds, or a picture of how the painting is supposed to look once it’s complete, and zip loc bags to store your diamonds once you are done using them. Be sure to read the description of the painting kit you buy to find out more about its contents.
The contents of the kits can help you understand which kit is better for your painting requirements. For example, first time diamond painters may find it difficult to complete a larger painting, and should opt for a smaller diamond painting. Likewise, some people are more comfortable with larger paintings which pose a bigger challenge to them.
It is important to know what you need in terms of your usage to help you make the right decision about buying a painting with diamonds kit. So, whenever you buy your next (or first) diamond paining kit, be sure to check everything.
HOW TO PAINT WITH DIAMONDS
Once you have decided what kind of diamond painting you want to purchase, and your painting has arrived at your door, the next step is to learn how to actually make a painting with diamonds. A diamond painting requires a little effort and practice to become proficient in it. The steps are easy enough to follow and will help you learn in no time.
Here we have a step-by-step way of painting with diamonds, from start to finish.
Before Painting
- Preparing the Space
Before you even start the painting, you will need to set up a work-space where you can be free of interruptions and distractions. Find a space that is high enough to be away from the reach of small children (if you have any) and find a space where everything is in your reach, to make sure you have a great time painting.
- Arranging the Painting Kit
Another important step of the process before you start your painting is to arrange your painting supplies in a manner that maximises your ease. All painting with diamonds kits have similar contents, one of which is the diamonds. It is important to store and sort out your diamonds before you start your painting, so you do not face any stray diamonds getting lost. In some cases, painters tape the canvas to a board or a different flat surface, but this will not be ideal for larger paintings.
Going through all these steps before you start painting is going to make for a better, smoother experience.
- Understanding the symbols
The next step is to understand the symbols and study them as best as you can before you start painting. This will help you get an image in your head regarding what the painting will look like and allow you to avoid mixing up similar-looking symbols. A thorough examination of the symbols will help your painting be quicker and better.
Starting the Painting
- Choosing your first diamonds
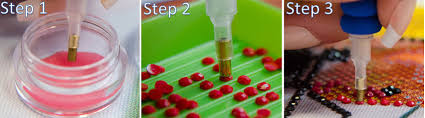
This is where the actual painting starts. Once you have arranged your space and studied the symbols on the canvas, you can begin the painting by pouring out the diamonds of your choice by pouring them into the tray, and giving them a little shake to make them face right-side up.
- Uncover the Canvas
Once you have the diamonds laid out in the tray, peel back some of the protective sheet from the canvas to start your painting.
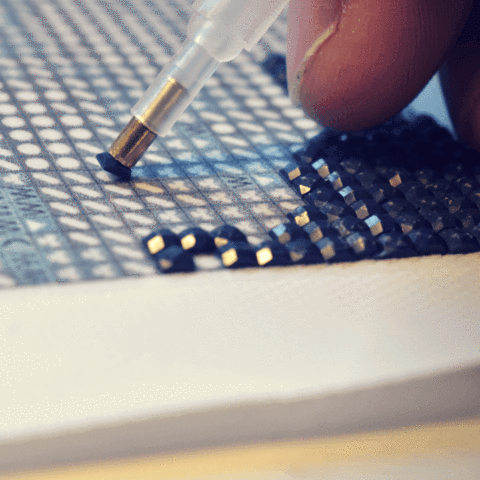
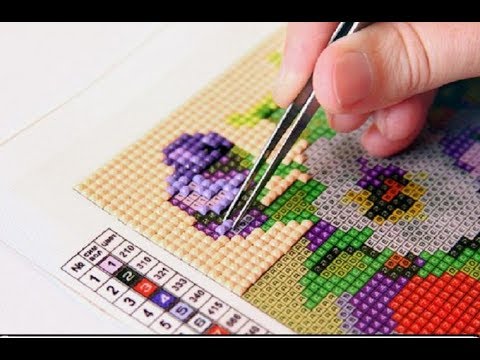
- Pick Up the Diamonds
Peel back the covering of the wax and dip your pen into the tub of wax to fill the nib. Once you do this, you can press the pen on the heads of the diamonds to pick them up. The diamonds will easily stick onto the pen.
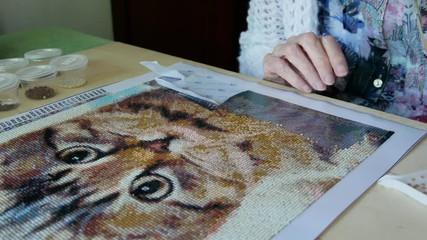
- Stick the Diamonds onto the Canvas
Start sticking the diamonds onto the canvas on their corresponding symbols, making sure not to apply too much pressure. This may cause the wax to stick onto the top of the diamond, dulling its shine.
- Repeat the Process
Stick all the diamonds onto their corresponding area respectively, and keep repeating until the whole painting is completed.You can cover the corners of the canvas with tape or paper to give it a finished look if you want.
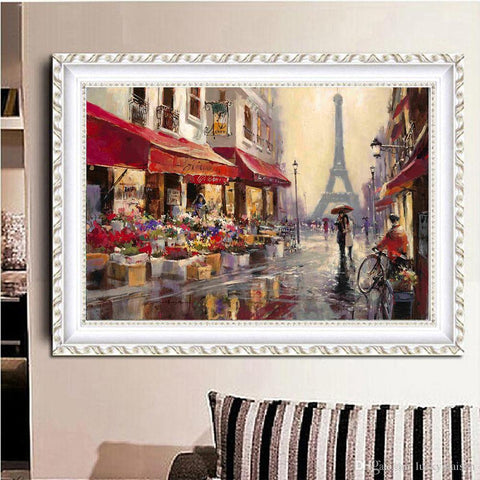
- Frame the Painting
Once the painting is finished, you can keep it forever by framing it up and hanging it in any of the places you frequent in your house or place of work.
Diamond Paintings Accessories
HEALTH BENEFITS OF PAINTING WITH DIAMONDS
By now, it seems we have learned about everything there is to know about painting with diamonds. But what makes diamond painting even more special is the many benefits you can reap from the process. Every time you take some time out to paint with diamonds, you concentrate on the task at hand and create something beautiful with your own hands, and that is an amazing feeling.
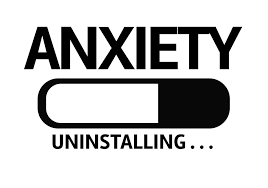
We imagine ourselves to be taking a break or relaxing our minds when we watch some TV or use social media, but that scientific research shows that these activities are linked with anxiety and stress issues.
What you really need to relax yourselves is an activity that not only engages your mind, but also your body, and in a healthy way. Painting with diamonds is the perfect way to disconnect from all of the things that are making you stressed and just enjoy a few hours doing something you love, and creating something beautiful and artistic in the process.
- Painting with diamonds can increase concentration.
Painting with diamonds allows you to engage in an activity where you perform repetitive actions, and the sole concentration of the painter on the painting helps increase the concentration of the painter. This is beneficial especially for children who have shorter attention spans and need interesting activities to keep them busy and away from their screens.

- Painting with diamonds can reduce symptoms of anxiety.
Painting with diamonds is an activity that requires a lot of time and attention. We have already mentioned above that too much screen time can cause increased symptoms of anxiety and stress, and painting with diamonds will give you an excuse to keep away from your phone. This may help build healthier habits and improve your mood too.
- Diamond painting improves motor skills.
We go through similar, yet repetitive motions when we are painting with diamonds. These actions can boost our muscle memory and help improve motor skills. Diamond painting can be a fun way to teach younger children some basic motor skills.
- Painting with diamonds promotes learning.
It is a widely held belief that we all learn better when we are experiencing things firsthand. When you paint with diamonds, you learn hands-on by practicing the movements and techniques again and again. It also helps with the development of better learning habits in general.

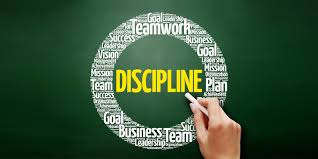
- Painting with diamonds increases discipline.
Painting with diamonds is a very methodical as well as therapeutic exercise. Discipline can be strengthened by making strong habits that can be repeated in the same way. Diamond painting proves to be a very useful tool in helping improve discipline in a person by engaging them in a healthy habit.
Imagine all the fun you can have while reaping these benefits from painting with diamonds. Few hobbies and crafts are as beneficial for your mental exercise as painting with diamonds.
We have already talked about what diamond painting is and what it entails, but there is an important part of painting with diamonds that we have yet to discuss.
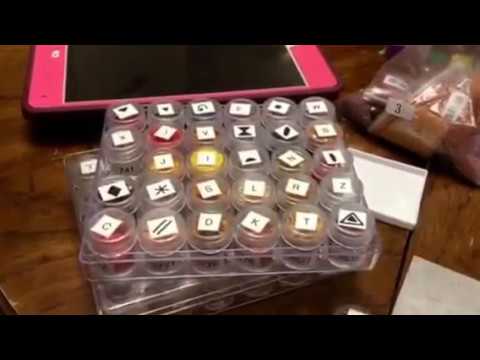
Diamond Painting Kit Organization Ideas
If you have any previous experience painting with diamonds, you will know how hard it can be to work on your painting if your diamond painting supplies are not properly organized and your workspace is out of order. And if you are new, you need to understand the importance of a clean and tidy workspace to create your diamond painting in.
Peace and relaxation are an important part of painting with diamonds, and you cannot have that if you are running around looking for your sneaky supplies. To save a lot of time and energy, it is better to organize your drills and other supplies before you start with the painting. For regular diamond painters, this can include organizing your leftover drills too.
Here I have gathered a few ways to make your diamond organization easier for you. These are only suggestions, and you should try a method that works best for you.
- Use shaped labels for your drills.
Labeling your drills is important in helping you identify different colored drills from each other, especially if they are in the same color family. But a great way to eliminate confusion between square and round drills is to use labels that are shaped in the way of the drills. If you have a lot of leftover diamonds from your older paintings, this can be a great way to sort those diamonds out.
- Re-purpose old boxes to store your supplies.
It is always satisfying to find use for acute, oldshoebox or chocolate box that you had been hoarding for the longest time, hoping it would be of use one day. Repurpose these boxes or tins for drill storage to help counter some of your carbon footprint as well as have a cute, personalized storage system for your beads.
- Make art with the beads that are left over.
A lot of frequent diamond painters will agree with me that sometimes the amount of all those leftover beads can be overwhelming. While some people throw the beads out, good use can come out of it. You can create different types of mosaic arts with the beads, or decorate anything from phone covers to notebook covers.
- Store your diamond painting separately.
Some diamond paintings take longer to be completed than others. It can be annoying for the painter to keep moving their supplies every time they continue with the painting, and cause loss of time too. Keep your diamond painting covered and on a separate surface where it will be ready to be picked up again in no time. Diamond painting stands can also be a great addition to your kit if you do not have an appropriate place to store your incomplete diamond paintings in.
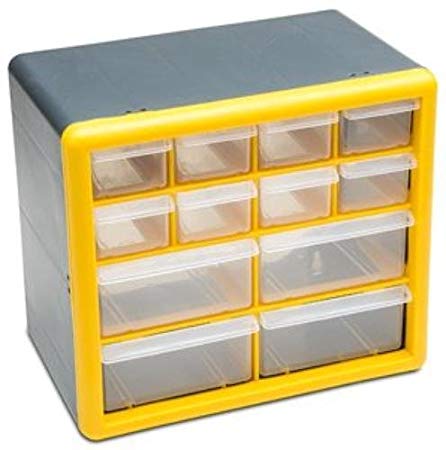
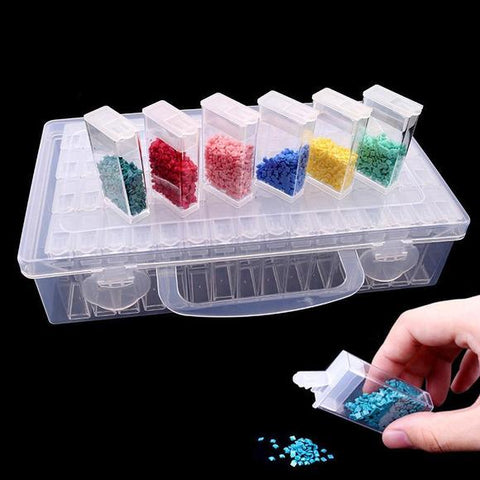
- Buy a multi-purpose organizer to store your supplies.
There are many types of multi-use organizers, some of which have adjustable slots, to help store your whole kit in one place. If you are not great with repurposing or going the extra mile to store your kit, or you do not have the time, buying such an organizer will make your painting with diamonds experience a lot more fun and convenient.
Organizing your kit can give you the peace of mind required to create a good diamond painting and enjoy it to the fullest, but there are many other tips and tricks you can use to make you a better diamond painter. Just remember, art is subjective. You cannot want to be like someone else, for your painting skills are authentic to yourself.
These tips will only help you as long as you keep practicing, and keep enjoying yourselves because that is what diamond painting is all about
Useful Tips:
These tips will only help you as long as you keep practicing, and keep enjoying yourselves, because that is what diamond painting is all about.
TIP 1: Select a kit that is most appropriate for you.
If you are buying a painting with diamonds kit for the first time, be sure to understand what kind of kit it is. Buy a kit that is not too large for you to handle, and take care to understand what the size of the actual painting will be on the canvas. Also make sure you don’t get a kit with too many similar colored diamonds that may become a pain later on. It is also important to choose the right shape of drills according to your skills.

TIP 2: Get the adhesive layer back on the canvas.
It may happen sometimes that when you peel back the covering of the canvas, the adhesive layer that allows diamonds to stick on the canvas is missing. Don’t worry though, this has a simple solution and the only issue is that layer has stuck to the covering of the canvas instead of the canvas itself. Simply cover the canvas again and press down on it, then peel it off from a different corner. You will find that the adhesive layer is back. If not, this is a sign of a sub-par quality kit.
TIP 3: Flatten your canvas.
Too many diamond painters complain about the fact that their canvases won’t lie straight while painting unless they have been pressed or taped to something. A really clever hack for this is to simply peel back the covering of the canvas, straighten the canvas out, then put the covering back on when it’s flat. Do this on all sides of the canvas to get an instantly flattened canvas.
TIP 4: Start your painting from the top.
A lot of people have their own styles of painting with diamonds, some start with the most sizable color of diamond, or some may start on the right or left of the canvas. But whatever you do, you want to make sure you are starting at the top of the canvas, so that as you continue, the canvas doesn’t slip down the surface you are working on.
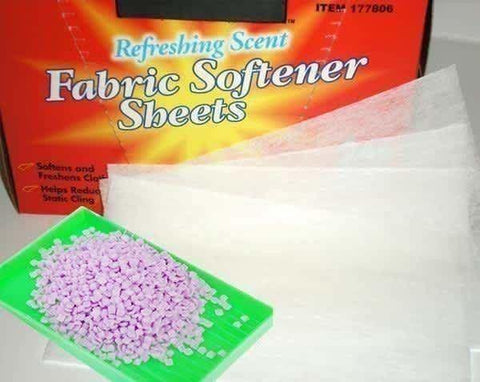
TIP 5: Get rid of static with dryer sheets.
Sometimes, when resins are stored close together, they start getting static which makes it hard for you to pick them up OR stick on the canvas. All you need to do is store them with a dryer sheet to remove the static.
TIP 6: Eliminate air bubbles from the canvas.
This is actually not a very common tip, but a very useful one so you might want to remember it the next time air bubbles in the canvas try to ruin your painting. Take a small blade, even a pin will work and make either a small cut, or just poke it to create a place for the air to escape without damaging the canvas.
TIP 7: Get perfectly-lined drills.
To make sure your diamonds are sticking right in the right place and not moving, place them in a zig-zag pattern on the canvas. This method will let the diamonds stick in straighter lines.

TIP 8: Keep your kit organized.
We have discussed how important an organized painting with diamonds kit can be vs a kit you have not pre-organized. This tip will save you a lot of headache and time by making it easier for you to access and use your diamond painting supplies.
TIP 9: Don’t apply too much pressure on the diamonds.
The tool with which you pick your diamonds up has wax in it. If you apply too much pressure on the diamonds while painting, the wax may get stuck on the diamonds and dull their shine.
TIP 10: Clean the drills that have lost their shine.
If in any case your diamonds do get wax on them, there is no need to fret. All you have to do to get the shine back is to let the diamonds settle down and dry, then clean the surface of the diamonds with a damp microfiber cloth gently to get the wax off.
TIP 11: Use square drills for a better-looking painting.
Round drills are a better choice for newer diamond painters, but they will not provide as much shine or as clear a finish as square drills. Using square drills closes all gaps between the drills and allows for a high-shine painting that will catch everyone’s attention.
TIP 12: Use tac in your diamond painting pick-up tool.
A great substitute for glue or wax in your diamond pick-up tool is tac.Tac is less sticky and more durable than the wax provided in some diamond painting kits, and is simple to be made at home too. To make DIY tac, just take out the glue from an old glue stick that slightly dried out and knead it until it has a soft, rubbery texture.
TIP 13: Gift your completed diamond paintings to your loved ones.
A gift can be a token of appreciation as well as love. To gift someone with something that you created with your own hands is a wonderful feeling. Gifting your completed paintings with diamonds to a loved one can show your gratitude and can be a great way for you to practice your painting with diamonds skills.
All these tips are easy to apply and will definitely take your diamond paintings up a notch. Try these out to make your diamond painting look better and feel better for yourself.
This article was meant to educate all diamond painters and encourage new painters to keep going at their craft, until they get better and also learn new things themselves. We hope this article has helped you and you can now safely say that you know everything there is to know about diamond painting.
Reviews